Next.js Cheatsheet - handy snippets and tips

I've been working on multiple Next.js (React framework) projects for some time. Whenever I need to set up a new Next.js project, I follow common steps like adding ESLint with Typescript support, debugging, SEO, Tailwind, SCSS support, Sitemap, etc. So, I made this cheatsheet containing all common steps one would probably need to build a Next.js prod web app.
Setup Next.js project
Create new Next.js project
- run command:
npx create-next-app- It'll install several packages including react:
react,react-domand for linting:eslint,eslint-config-next. - You can see repo changes at this point.
- It'll install several packages including react:
Run locally
-
Run command:
npm run dev -
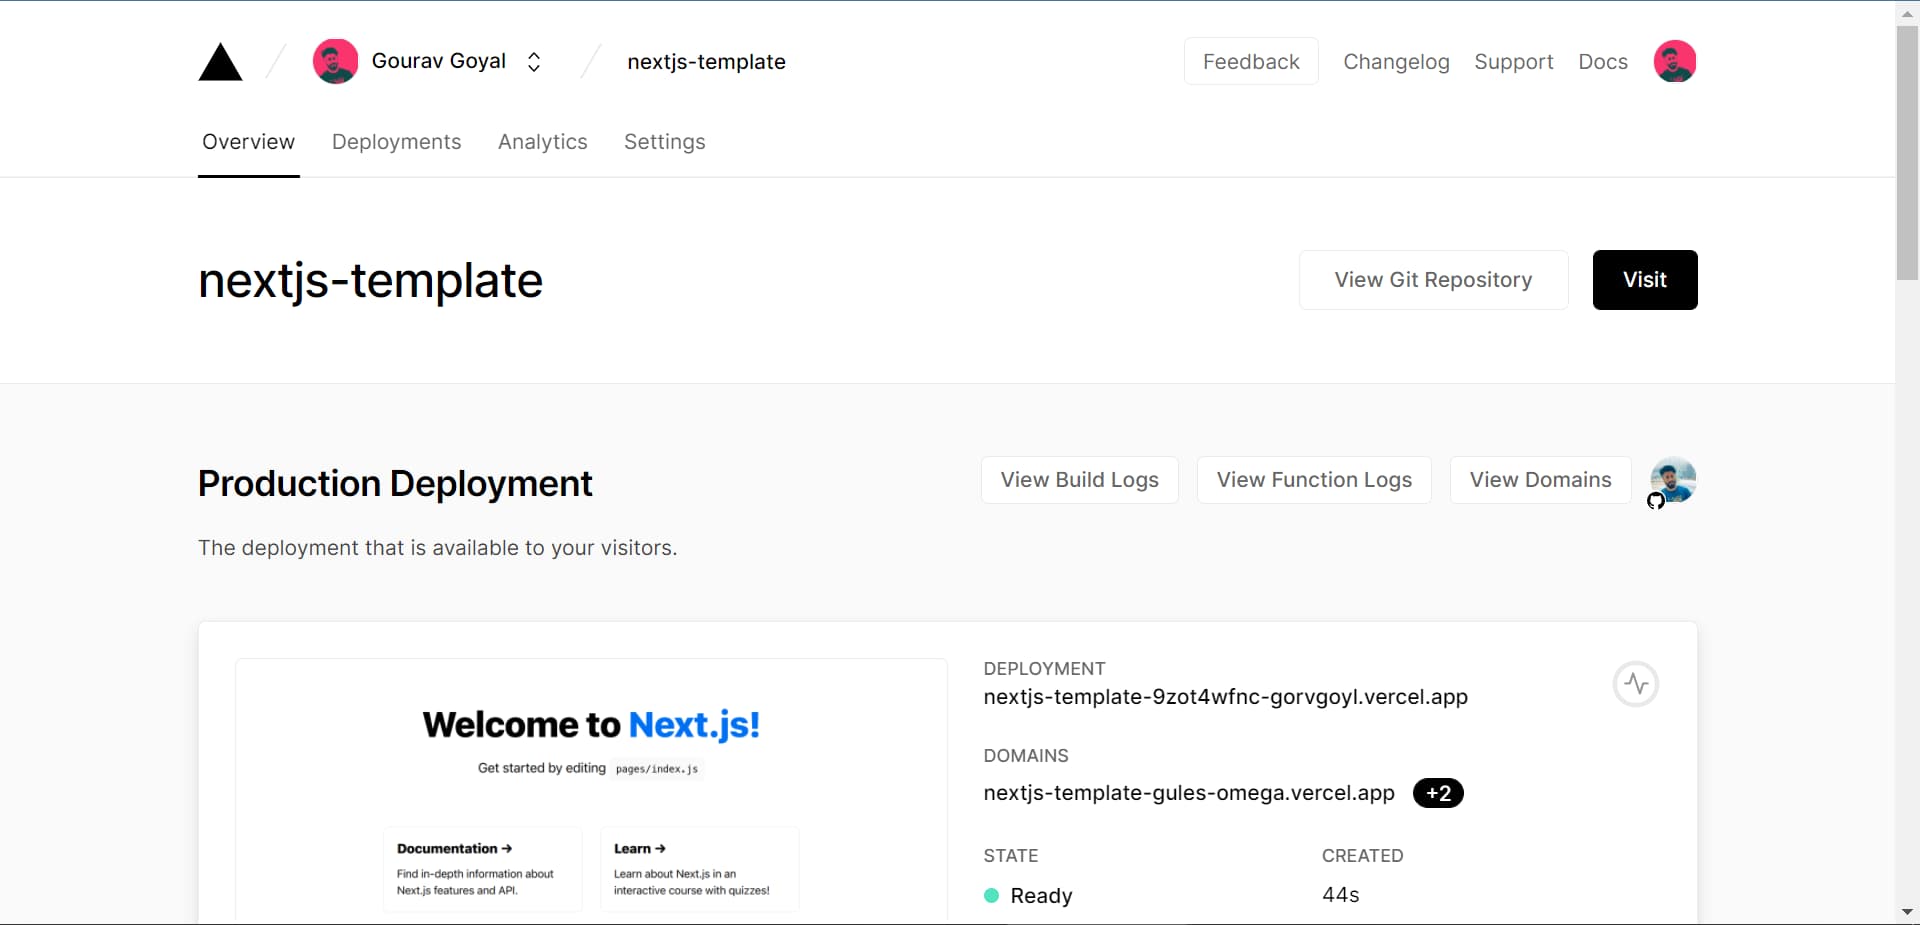
Visit
http://localhost:3000. You'd see something like below image: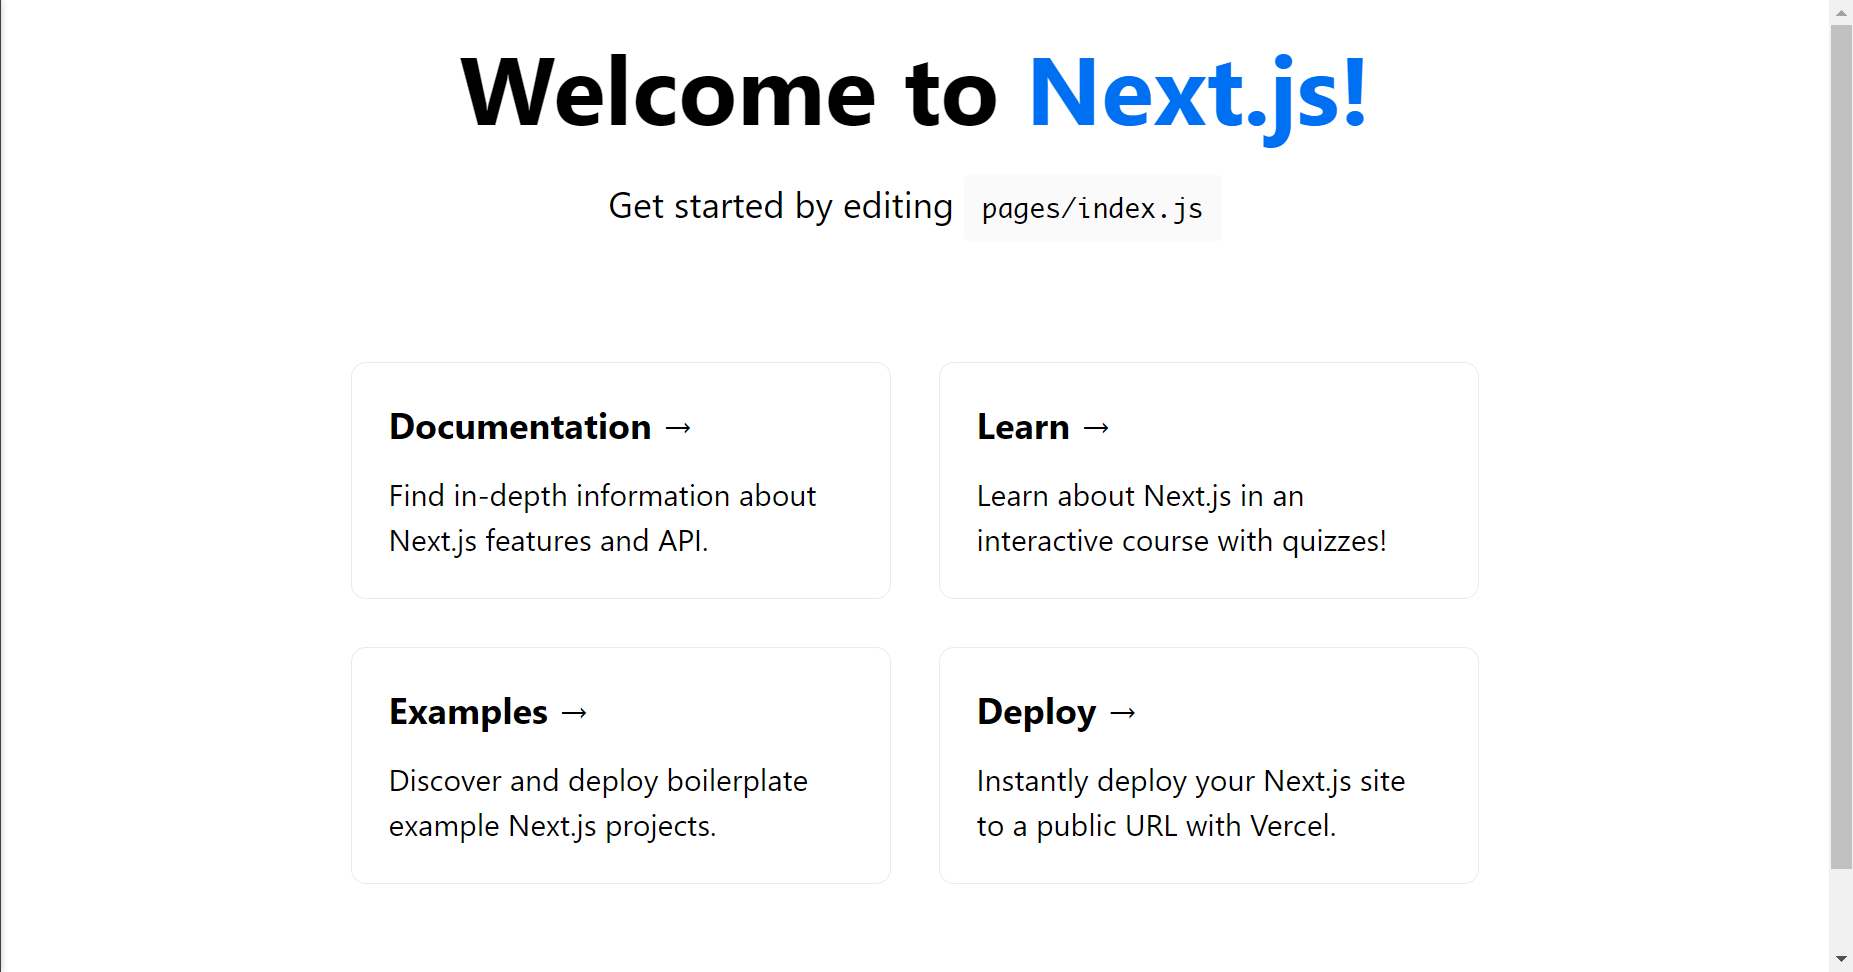
Debug Next.js in VSCode
Useful to put breakpoints in VSCode and pause active session to inspect data.
-
Create a file named
.vscode/launch.jsonat the root of your project and paste below content:{ "version": "0.2.0", "configurations": [ { "name": "Next.js: attach", "port": 9229, "request": "attach", "skipFiles": ["<node_internals>/**"], "type": "node", "restart": true }, { "name": "Next.js: debug server-side", "type": "node-terminal", "request": "launch", "command": "npm run dev" }, { "name": "Next.js: debug client-side", "type": "pwa-chrome", "request": "launch", "url": "http://localhost:3000" }, { "name": "Next.js: debug full stack", "type": "node-terminal", "request": "launch", "command": "npm run dev", "console": "integratedTerminal", "serverReadyAction": { "pattern": "started server on .+, url: (https?://.+)", "uriFormat": "%s", "action": "debugWithChrome" } } ] } -
Go to VSCode Debug panel (Ctrl+Shift+D on Windows/Linux, ⇧+⌘+D on macOS), select a launch configuration, then press F5 or select Debug: Start Debugging from the Command Palette to start your debugging session.
- Types of debugging sessions:
Next.js: debug server-side: It'll runnpm run devcommand and you'd be able to put breakpoints for both frontend files and api routes.Next.js: debug client-side: you need to runnpm run devprior to starting this debugging session. Upon starting session it'll open a new chrome window and load your site. You can put breakpoints only in frontend code (no api routes).Next.js: debug full stack: It'll open a new chrome window and you'll be able to put breakpoints in both frontend and api routes.Next.js: attach: Works for both frontend and backend. Extra steps are needed to make it work:- Run:
npm i cross-env - Add this to package.json
"start:debug": "cross-env NODE_OPTIONS='--inspect' next dev" - Run:
npm run start:debug - Run
Next.js: attachsession
- Run:
Also, there's a separate guide to debug using Chrome DevTools instead.
Run localhost in mobile
- Run:
npm run dev - Find your desktop IPv4 address. (For Windows:
ipconfig /all, on Mac:ipconfig getifaddr en0) - Open site in mobile: http://laptop_IPv4_address:3000 (replace
laptop_IPv4_addresswith actual IPv4 address)
Disable telemetry
Next.js collects completely anonymous telemetry data about general usage. Run this command to disable it:
npx next telemetry disable
Disable emails from vercel[bot] which comes after every github commit
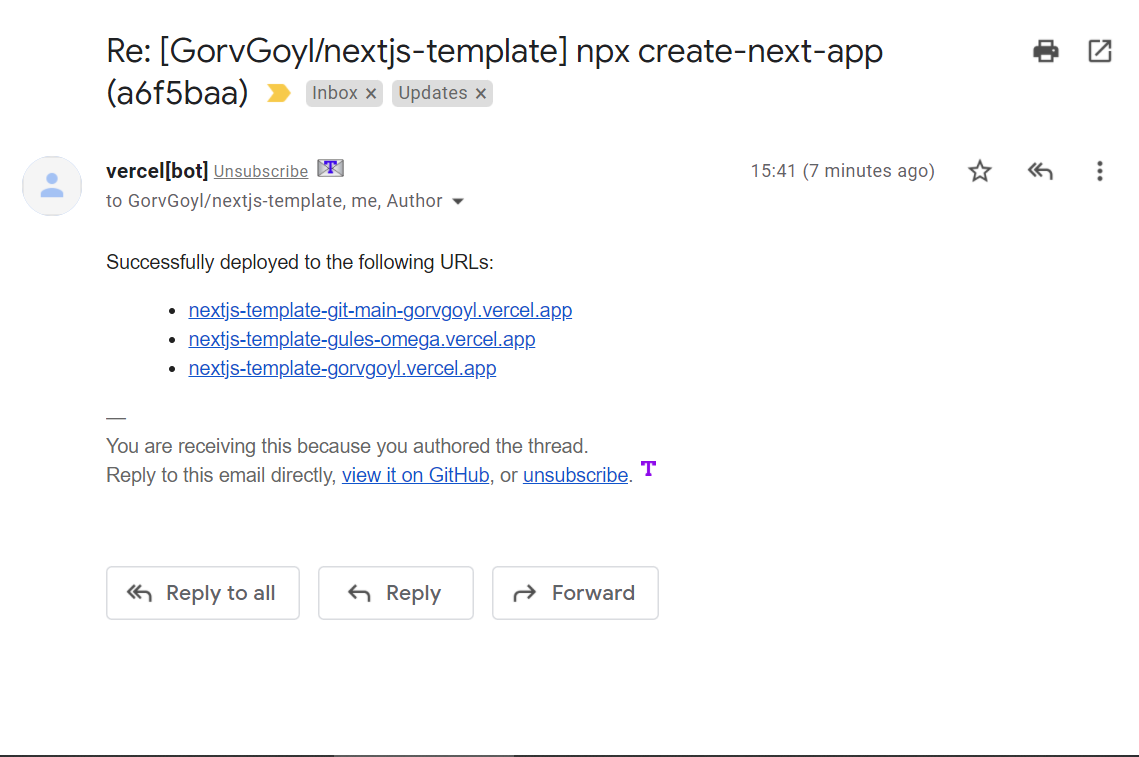
-
Create
vercel.jsonat root of project and paste this:{ "github": { "silent": true } } -
Commit and push this file to Github.
Deployment
Netlify
- Deploy new Next.js project.
- Deploy existing Next.js project.
Vercel
-
Commit any pending changes to the repo and link it on Github.
-
Create a free account at https://vercel.com/
-
Create a new project https://vercel.com/new
-
Import this github repository (give Github access to Vercel when asked).
-
Skip creating a team (it's a paid feature) if asked.
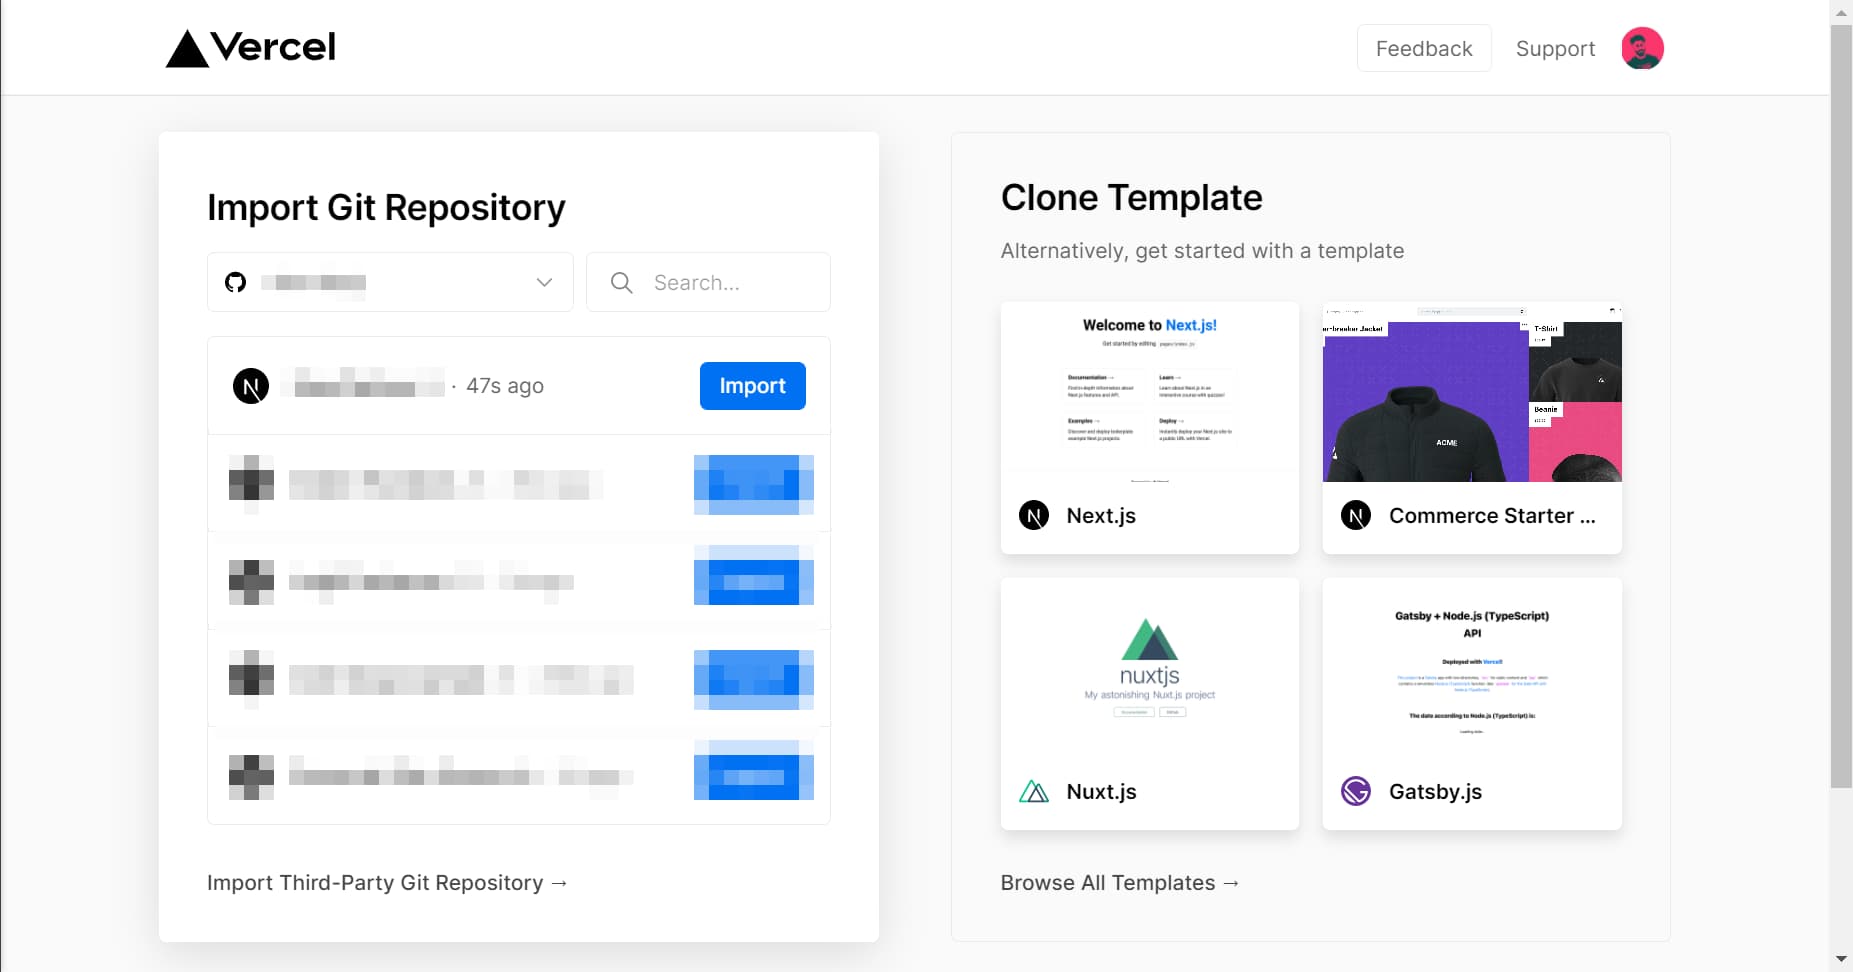
-
Click Deploy. Vercel will give you a custom public URL (ending with
.vercel.app) for your site. You can later replace it with your own domain.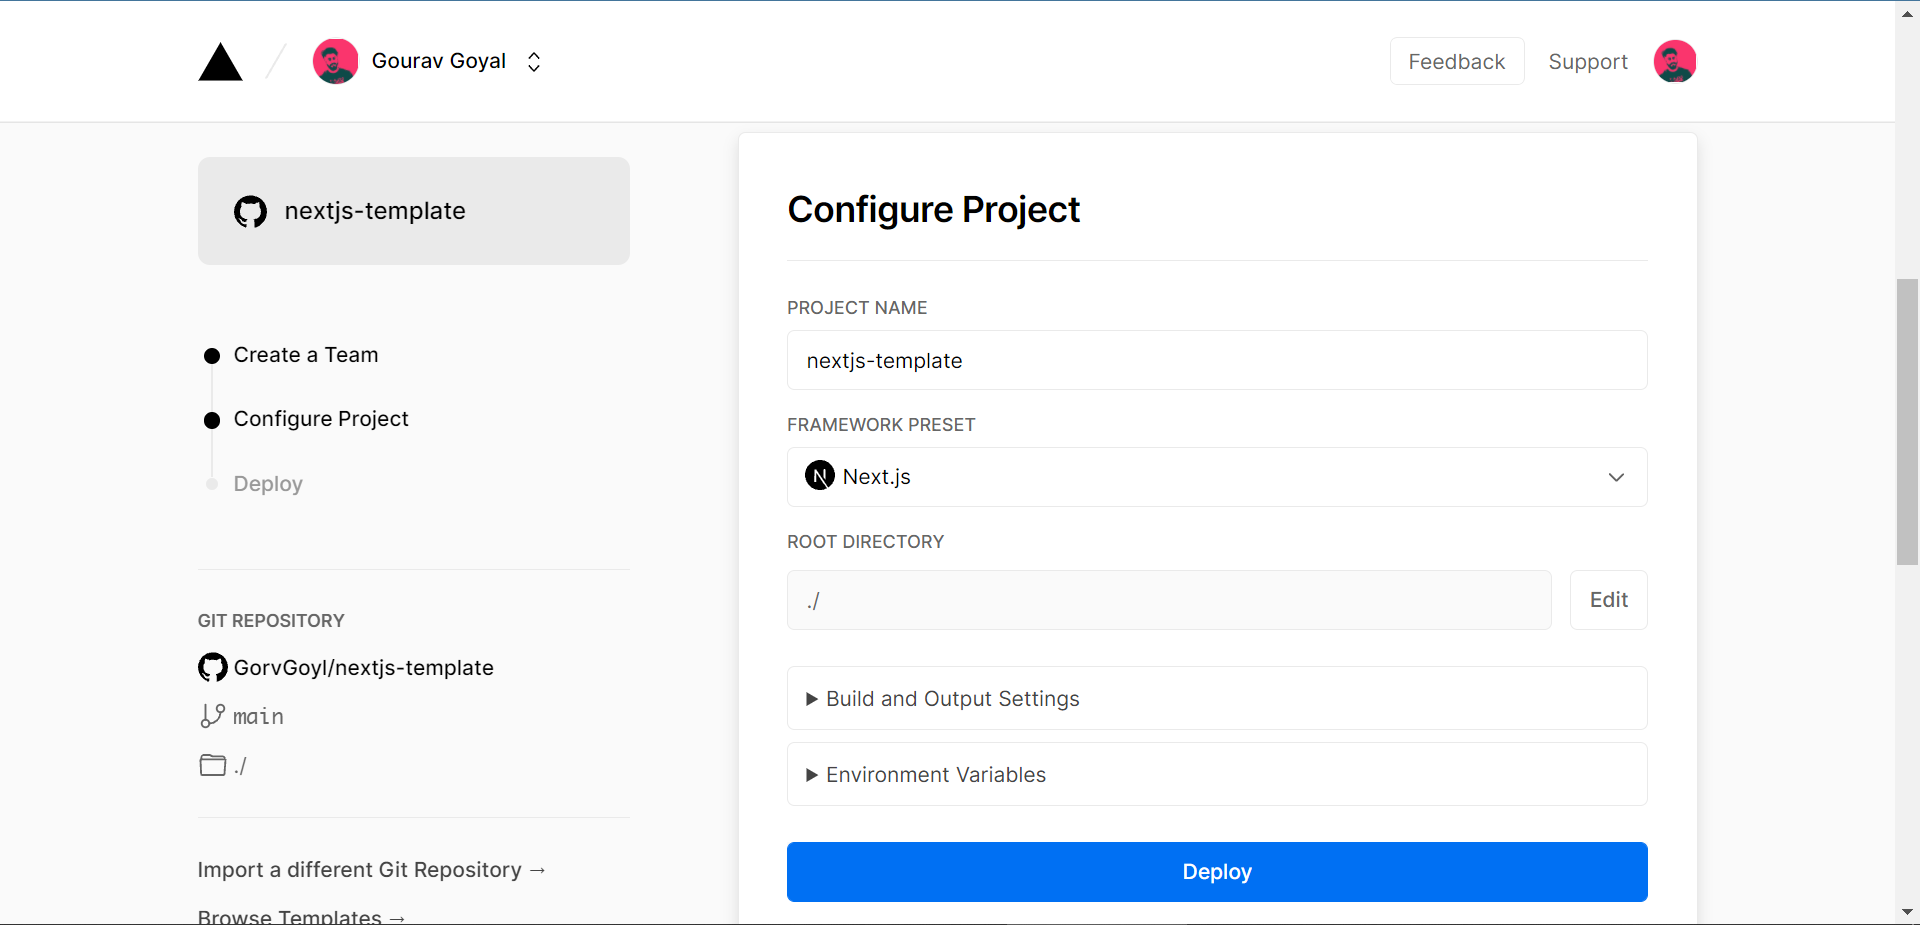
Deploy to Preview and Production
- Push to any branch other than
mainon Github and Vercel will deploy to a custom public URL (unique for every deployment). Useful for testing purpose before making it live on production domain. - Push to
mainbranch on Github and vercel will deploy to production domain.
Link custom domain
-
Go to your domain registrar website (Godaddy, Namecheap, etc) and change nameserver to:
ns1.vercel-dns.com ns2.vercel-dns.com -
Now go to https://vercel.com/dashboard/domains and add that custom domain.
Create development url like dev.yoursite.com
Creating different environments for development and production is a neat way to do development while maintaining a bug-free production server. All the changes you do on a dev branch will be deployed to dev.yoursite.com and won't affect your prod site yoursite.com. Let's set this up:
-
Create git dev branch:
git checkout -b dev- Commit something (at least one new commit is required for Vercel to deploy this branch)
- Push branch to github:
git push --set-upstream origin dev
-
In Vercel, go to project domain: https://vercel.com/{username}/{project}/settings/domains.
-
Add domain: dev.yoursite.com
-
Add Git branch:
devand save.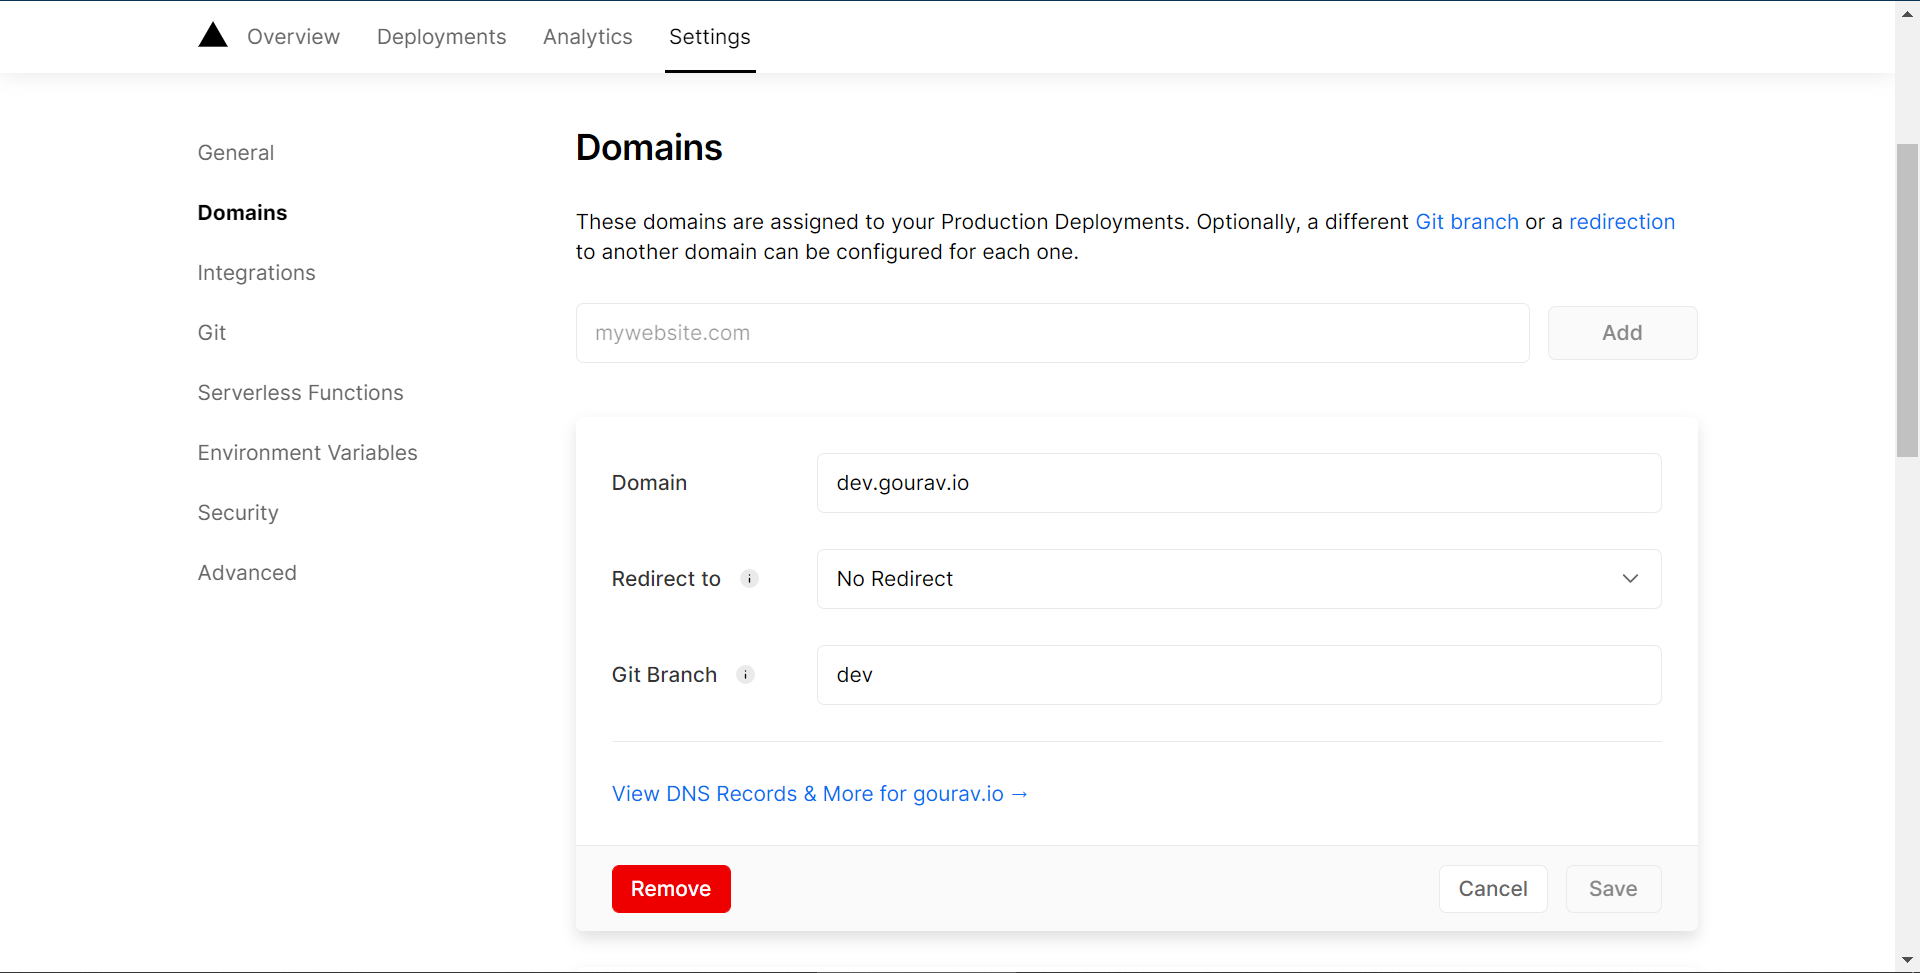
-
-
Visit your dev site
dev.yoursite.com -
Any commits made to
devbranch will now show indev.yoursite.comalong with unique url generated by Vercel for that deployment.
Later, when everything seems okay you can merge code from dev -> main branch to reflect changes on prod server.
You can create even more branches like testing, staging, etc.
Get Slack notification when Vercel deployment fails
check out my article: Get Slack notification when Vercel deployment fails for Next.js project (gourav.io)
Add Typescript support
typescript version at the time of writing this article: 4.4
Add Typescript when creating a new Next.js project
- Just run
npx create-next-app@latest --ts
Add Typescript to existing Next.js project
- Run
npm i -D typescript @types/react @types/node. - Create empty
tsconfig.jsonfile at root of project. - Run
npm run devand it'll filltsconfig.json. - Now, Change Javascript files extension to Typescript extension.
.jsfiles which have react related code (components etc) should be converted to.tsxand rest of.jsfiles should be converted to.ts
pages\api\hello.js -> pages\api\hello.ts
pages\_app.js -> pages\_app.tsx
pages\index.js -> pages\index.tsx
You can see repo changes at this point.
Test it locally:
- Run
npm run devand visithttp://localhost:3000/(page should look same as before) - Also, test the api route for file (pages\api\hello.ts)
Visit http://localhost:3000/api/hello
output should be:
{"name":"John Doe"}
Check for any Typescript errors
-
You can either build the project:
npm run build(it'll show TS errors) -
Or create a separate command for it: add
"tsc": "tsc"topackage.jsonscripts section{ "scripts": { "tsc": "tsc" } } -
Run
npm run tsc
Strict Type checking (Optional)
Strict type checking is useful if you want to further reduce the scope of errors.
-
To enable:
- in
tsconfig.jsonchange"strict": falseto"strict": true
- in
-
Now, if you run
npm run buildornpm run tscit'll throw below errors likeXXX implicitly has an 'any' type.pages/_app.tsx:3:18 - error TS7031: Binding element 'Component' implicitly has an 'any' type. 3 function MyApp({ Component, pageProps }) { ~~~~~~~~~ pages/_app.tsx:3:29 - error TS7031: Binding element 'pageProps' implicitly has an 'any' type. 3 function MyApp({ Component, pageProps }) { ~~~~~~~~~ pages/api/hello.ts:3:33 - error TS7006: Parameter 'req' implicitly has an 'any' type. 3 export default function handler(req, res) { ~~~ pages/api/hello.ts:3:38 - error TS7006: Parameter 'res' implicitly has an 'any' type. 3 export default function handler(req, res) { ~~~ Found 4 errors.
You can either define the type for those errors or suppress these errors by enabling use of any.
-
To allow use of
anyopentsconfig.jsonand add"noImplicitAny": falsetocompilerOptions{ "compilerOptions": { "noImplicitAny": false //set 'true' to throw error for 'any' } } -
Run
npm run tscand now it shouldn't give you any error. At this point, completetsconfig.jsonshould look like this:{ "compilerOptions": { "target": "es5", "lib": ["dom", "dom.iterable", "esnext"], "allowJs": true, "skipLibCheck": true, "strict": true, // strict type checking is enabled "forceConsistentCasingInFileNames": true, "noEmit": true, "esModuleInterop": true, "module": "esnext", "moduleResolution": "node", "noImplicitAny": false, // set 'true' to throw error for 'any' "resolveJsonModule": true, "isolatedModules": true, "jsx": "preserve" }, "include": ["next-env.d.ts", "**/*.ts", "**/*.tsx"], "exclude": ["node_modules"] }
At this point, complete package.json should look like this:
{
  "name": "nextjs-template",
  "version": "0.1.0",
  "private": true,
  "scripts": {
    "dev": "next dev",
    "build": "next build",
    "start": "next start",
    "lint": "next lint",
    "tsc": "tsc"
  },
  "dependencies": {
    "next": "11.1.2",
    "react": "17.0.2",
    "react-dom": "17.0.2"
  },
  "devDependencies": {
    "@types/node": "^16.10.3",
    "@types/react": "^17.0.27",
    "eslint": "8.0.0",
    "eslint-config-next": "11.1.2",
    "typescript": "^4.4.3"
  }
}
- You can also checkout the sample repository for Next.js.
Add ESLint to Next.js Typescript project
To add ESLint in Next.js Javascript project. see https://stackoverflow.com/a/61160352/3073272
There are few steps required for adding proper support of ESLint to TS project:
-
First step to install few ESLint packages is already done at time of creating Next.js project i.e.
npx create-next-app, it installedeslintandeslint-config-next. -
Install TS related ESLint packages:
npm i -D @typescript-eslint/parser @typescript-eslint/eslint-plugin @next/eslint-plugin-next -
Install VSCode ESLint extension: ESLint
Explanations:
eslintis the main ESLint package.@typescript-eslint/parserwill allow ESLint to parse TypeScript files.@typescript-eslint/eslint-pluginwill add TypeScript specific lint rules.eslint-config-nextadds multiple useful plugins (next, react, and react-hooks) (full list of plugins)@next/eslint-plugin-nextto catch common issues and problems in a Next.js application. -
Create/edit file
.eslintrc.jsonat root of project and replace with below content: (to mention plugins, configs, rules for linting){ "root": true, "env": { "browser": true, "es6": true, "node": true }, "settings": { "react": { "version": "detect" } }, "parser": "@typescript-eslint/parser", "parserOptions": { "project": "./tsconfig.json", // tells parser relative path of tsconfig.json "ecmaFeatures": { "jsx": true }, "ecmaVersion": 12, "sourceType": "module" }, // all plugins (eslint-plugin-xxx) go here: "plugins": [ "@typescript-eslint", "@next/eslint-plugin-next" // https://github.com/vercel/next.js/blob/canary/packages/eslint-plugin-next/lib/index.js ], // all configs (eslint-config-xxx) go here: "extends": [ "eslint:recommended", "plugin:react/recommended", "plugin:@typescript-eslint/recommended", "plugin:@typescript-eslint/recommended-requiring-type-checking", // contains rules that specifically require type information "plugin:@next/next/recommended", "next", // https://github.com/vercel/next.js/blob/canary/packages/eslint-config-next/package.json "next/core-web-vitals" ], "rules": { // ...add rules which you'd like to disable } } -
Create file
.eslintignoreat root of project: (It tells ESLint to ignore files when linting)# don't ever lint node_modules **/node_modules/* # don't lint build output (make sure it's set to your correct build folder name) dist # don't lint nyc coverage output coverage **/.next/* *.json *.lock *.css *.scss **/out/* next-env.d.ts # next.config.js -
Include support for
.jsfiles intsconfig.json:{ "include": ["next-env.d.ts", "**/*.ts", "**/*.tsx", "**/*.js"], "exclude": ["node_modules", ".next", ".vercel", "out"] } -
Restart VSCode to activate ESLint.
Test Linting (ESLint)
VSCode will show warnings and errors in files which have linting issues.
We can also explicitly check for these issues by running a command.
-
Add below to
package.jsonscripts if it's not added already:{ "scripts": { "lint": "next lint" } } -
Run
npm run lintand you should see some errors & warnings.
Fix lint warnings & errors:
Modify _app.tsx according to it:
import { AppProps } from "next/app";

import "../styles/globals.css";

function MyApp({ Component, pageProps }: AppProps): JSX.Element {
  return <Component {...pageProps} />;
}

export default MyApp;
In index.tsx, add return type as JSX.Element to Home function:
export default function Home(): JSX.Element {
In hello.ts:
/* eslint-disable import/no-anonymous-default-export */
import type { NextApiRequest, NextApiResponse } from "next";

type Data = {
  name: string;
};
export default (req: NextApiRequest, res: NextApiResponse<Data>): void => {
  res.status(200).json({ name: "John Doe" });
};
Run npm run lint to test again. There shouldn't be any issues now.
Disable or suppress linting errors and warnings
- To suppress issue for a particular line basis:
ctrl+.and select disable for this line. (ctrl+.is a VSCode shortcut) - To suppress issue for entire file:
ctrl+.and select disable for entire file - Disable rule for entire project
-
Add that rule to
.eslintrc.json.Options for any specific rule:
"off": to completely shut this rule.
"warn": rule violation will show as warning.
"on": rule violation will show it as error.
.eslintrc.json:{ rules: { "jsx-a11y/anchor-is-valid": "off", // disable this rule }, }
-
package.json at this point:
{
  "name": "nextjs-template",
  "version": "0.1.0",
  "private": true,
  "scripts": {
    "dev": "next dev",
    "build": "next build",
    "start": "next start",
    "lint": "next lint",
    "tsc": "tsc"
  },
  "dependencies": {
    "next": "11.1.2",
    "react": "17.0.2",
    "react-dom": "17.0.2"
  },
  "devDependencies": {
    "@next/eslint-plugin-next": "^11.1.2",
    "@types/node": "^16.10.3",
    "@types/react": "^17.0.27",
    "@typescript-eslint/eslint-plugin": "^4.33.0",
    "eslint": "^7.23.0",
    "eslint-config-next": "11.1.2",
    "typescript": "^4.4.3"
  }
}
- You can see repo changes at this point.
Add support for Prettier in Next.js project with ESLint
Prettier is an opinionated code formatter with support for many popular languages (js, ts, html, css, etc.). So, whenever you hit ctrl+s, it'll beautify/format the file.
-
Install VSCode extension: Prettier - Code formatter.
(that's it! do not install any other prettier related eslint plugins or extensions as those make the whole project slow. Let prettier do its job independently. read more
-
In VSCode settings (
ctrl+,):- Set
Default FormattertoPrettier - code formatter - Enable
Format on Save
- Set
-
You may need to disable any formatting related eslint rules as Prettier will handle formatting from now on. You can disable those rules in
.eslintrc.jsonor use eslint-config-prettier. -
Restart VSCode and try to save any unformatted file.
Add Styling
Add custom fonts
Holy Tip: These days you need not serve multiple font files as variable fonts are widely supported by using just one file. Moreover, the newer font format woff2 has a better compression ratio and is again widely supported.
-
Put variable font file (
.woff2) in/public/fonts/folder -
Add it to
_document.tsxfile so that it's fetched for all pages:export default class MyDocument extends Document { render(): JSX.Element { return ( <Html> <Head> <link rel="preload" href="/fonts/inter-var-latin.woff2" as="font" type="font/woff2" crossOrigin="anonymous" /> </Head> ... -
Mention in global CSS file so that it's applied to all pages:
@font-face { font-family: "Inter"; font-style: normal; font-weight: 100 900; font-display: optional; src: url(/fonts/inter-var-latin.woff2) format("woff2"); } -
Tell browser to cache this font file for a long time (~1yr) to avoid unnecessary re-downloads for subsequent site visits. Add headers to
next.config.json:module.exports = { async headers() { return [ { source: "/fonts/inter-var-latin.woff2", headers: [ { key: "Cache-Control", value: "public, max-age=31536000, immutable", }, ], }, ]; }, };
Add Tailwind CSS to Next.js project
https://tailwindcss.com/docs/guides/nextjs
-
Install VSCode extension: Tailwind CSS IntelliSense
-
Run:
npm i -D tailwindcss@latest postcss@latest autoprefixer@latest -
Run:
npx tailwindcss init -p(It'll generatetailwind.config.jsandpostcss.config.jsfiles) -
Paste below to
tailwind.config.js:module.exports = { future: { removeDeprecatedGapUtilities: true, }, mode: "jit", purge: ["./pages/**/*.{js,ts,jsx,tsx}", "./components/**/*.{js,ts,jsx,tsx}"], // remove unused styles in production darkMode: false, // or 'media' or 'class' theme: { extend: {}, }, variants: { extend: {}, }, plugins: [], }; -
Make sure
postcss.config.jsis also generated with below code:module.exports = { plugins: { tailwindcss: {}, autoprefixer: {}, }, }; -
Paste below to
styles\\globals.css@tailwind base; @tailwind components; @tailwind utilities; -
Import style in
pages\\_app.tsxif not done alreadyimport { AppProps } from "next/app"; import "../styles/globals.css"; function MyApp({ Component, pageProps }: AppProps): JSX.Element { return <Component {...pageProps} />; } export default MyApp;
- To add custom CSS styles, see:
You can see repo changes at this point.
Add SASS/SCSS support to Next.js project
- Run:
npm i sass - Rename all
.cssfiles to.scss - Also, update this change in
importstatements i.e.import "../styles/globals.scss",import styles from "../styles/Home.module.scss";
That's all. Start writing css styles in scss syntax.
Add SEO
Checkout free SEO course by Next.js: https://nextjs.org/learn/seo/introduction-to-seo
Set Redirect from www.yoursite.com to yoursite.com
It means whenever someone visits www.yoursite.com it'll be redirected to yoursite.com without hurting SEO.
- Go to domains settings inside Vercel: https://vercel.com/{username}/{project}/settings/domains
- Add an entry
yoursite.comif not added already. config should be like this: domain: yoursite.com Redirect to: No redirect possible Git Branch: main - Add a new entry
www.yoursite.comif not added already config should be like this: domain: www.yoursite.com Redirect to: yoursite.com Status Code: 308 Permanent Redirect Git Branch: main
Add SEO meta tags and favicon
Whenever you share a website link on Twitter, LinkedIn, Whatsapp, etc, you must have noticed that it generates a little preview containing a title, description and a preview image. Platform picks this info from site meta tags. Luckily, there's an npm library which makes it easy to add meta tags to next.js project.
-
Install next-seo:
npm i next-seo -
Create a file
header.tsxand paste below code:import { NextSeo } from "next-seo"; import { useRouter } from "next/router"; export default function Header(): JSX.Element { const title = "Gourav Goyal"; const desc = "I'm a tech founder, digital nomad, and a fun guy to hang around with. I like to build things that others find helpful."; const ogImgRelativePath = "/og.png"; const siteURL = "https://gourav.io"; const ogImageURL = `${siteURL}${ogImgRelativePath}`; const pathName = useRouter().pathname; const pageURL = pathName === "/" ? siteURL : siteURL + pathName; const twitterHandle = "@GorvGoyl"; const siteName = "Gourav.io"; return ( <NextSeo title={title} description={desc} canonical={pageURL} openGraph={{ type: "website", locale: "en_US", // Default is en_US url: pageURL, title, description: desc, images: [ { url: ogImageURL, width: 1200, height: 630, alt: "Gourav.io - personal site and blog", }, ], site_name: siteName, }} twitter={{ handle: twitterHandle, site: twitterHandle, cardType: "summary_large_image", }} additionalMetaTags={[ { property: "author", content: title, }, ]} additionalLinkTags={[ { rel: "icon", href: `${siteURL}/favicon.ico`, }, // { // rel: "manifest", // href: "/site.manifest", // }, ]} /> ); } -
Set proper value of
title,desc,ogImgRelativePath,siteURL, etc. -
Create favicon.ico:
- create favicon by image, text, or emoji: https://favicon.io/
- put
favicon.icoinsidepublic/folder.
-
Create an OG Image (preview image) of size 1200x630, name it
og.pngand put it inpublic/folder. -
import
Header.tsxto all of your website pages which need meta tags.import Header from "@/components/header"; export default function Home(): JSX.Element { return ( <> <Header /> ...rest of code </> ); }
To verify metatags:
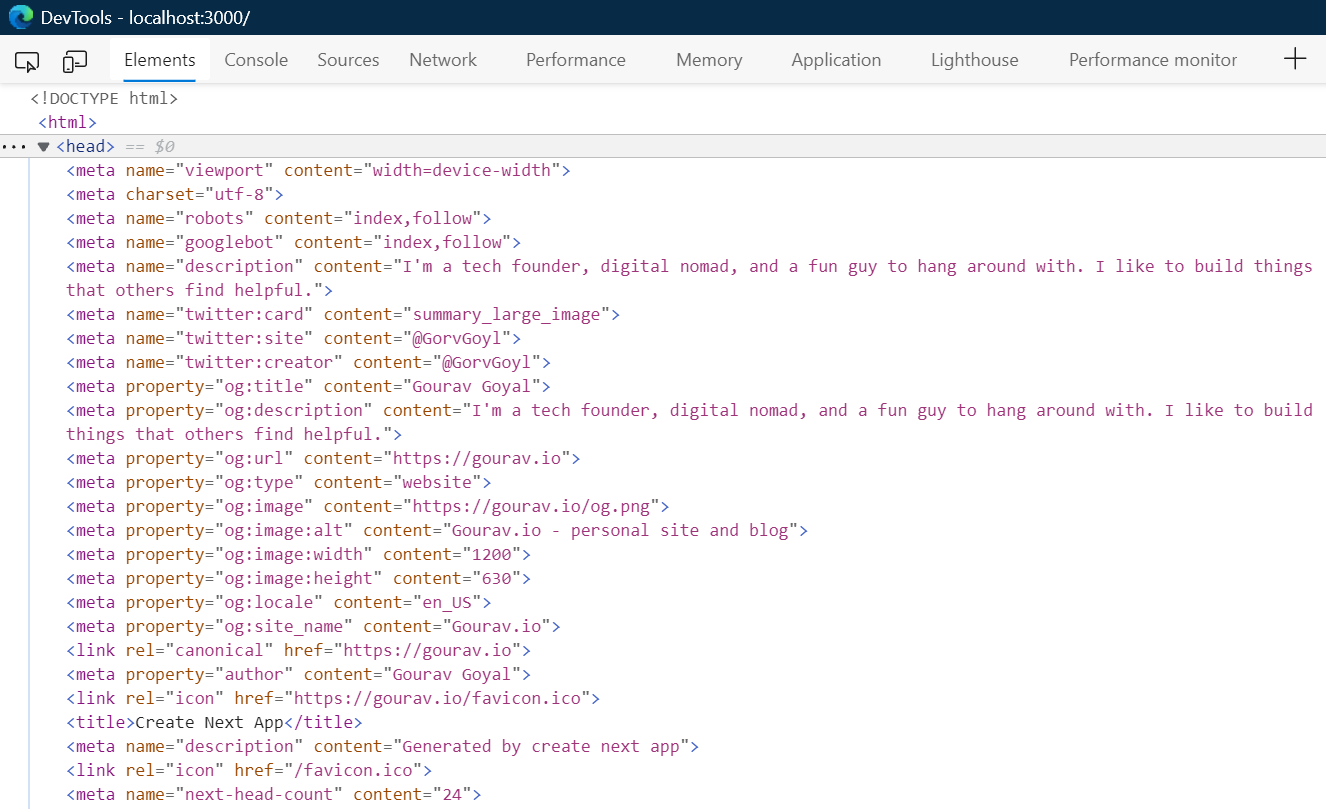
-
Locally you can verify it in dev tools -> Elements -> html/head section:
-
After deployment you can verify it via https://metatags.io (enter your site name in input field)
Create dynamic sitemap
Using custom post-build script
Up-to date sitemap will be generated every time you do a deployment (during build process) so no need to manually add/update/remove urls in sitemap.
-
Create
/scriptsfolder and create new file inside it:generate-sitemap.mjs -
Install required
globbypackage:npm i -D globby -
Paste below to
generate-sitemap.mjs. ReplacehomeURLwith your domain.import { writeFileSync } from "fs"; import { globby } from "globby"; const homeURL = "https://yoursite.com"; (async () => { try { console.log("generating sitemap.."); const pages = await globby([ "pages/**/*.tsx", "!pages/_*.tsx", "!pages/api", "!pages/404.tsx", ]); const sitemap = `<?xml version="1.0" encoding="UTF-8"?> <urlset xmlns="http://www.sitemaps.org/schemas/sitemap/0.9"> ${pages .map((page) => { const path = page .replace("pages/", "/") .replace(".tsx", "") .replace("/index", ""); const route = path === "/index" ? "" : path; const fullUrl = `${homeURL}${route}`; console.log(fullUrl); return ` <url> <loc>${fullUrl}</loc> </url> `; }) .join("")} </urlset>`; writeFileSync("public/sitemap.xml", sitemap); console.log("sitemap generated"); } catch (e) { console.log(e); process.exit(1); } })(); -
Ignore this file from linting as it's not typescript compatible:
- Create
.eslintignorefile at root of project - Add below line:
*.mjs - Create
-
in
package.jsonadd belowpostbuildstep.postbuildstep will run automatically after thebuildstep (due topostprefix).{ "scripts": { "build": "next build", "postbuild": "node ./scripts/generate-sitemap.mjs" }, }
-
Now if you run
npm run build, a new filesitemap.xmlwill be created under./public:<?xml version="1.0" encoding="UTF-8"?> <urlset xmlns="http://www.sitemaps.org/schemas/sitemap/0.9"> <url> <loc>https://yoursite.com</loc> </url> </urlset> -
Also create
/public/robots.txtand paste below and replace mysite.com with your site. This gives permission to web crawlers (e.g. Google) to crawl and index your site and its pages.User-agent: * Sitemap: https://mysite.com/sitemap.xml -
Check in code and deploy. you should see sitemap by visiting:
https://mysite.com/sitemap.xml -
Submit this source map to Google: https://search.google.com/search-console
Using npm package next-sitemap
-
Install next-sitemap:
npm i -D next-sitemap -
Create a config file.
next-sitemapwill look for a file namednext-sitemap.jsin thepublic/by default. Using Windows, this does not work because of a naming conflict. Instead, create a file namedsitemap-generator.jswith the following configuration:module.exports = { siteUrl: "https://yourdomain.com", generateRobotsTxt: true, exclude: ["/en*", "/de*", "/disallowed"], alternateRefs: [ { href: "https://yourdomain.com/en", hreflang: "en", }, { href: "https://yourdomain.com/de", hreflang: "de", }, ], robotsTxtOptions: { policies: [ { userAgent: "*", disallow: "/disallowed", }, { userAgent: "*", allow: "/", }, ], }, }; -
Finally, add the
postbuildscript topackage.json"scripts": { "dev": "next dev", "build": "next build", "start": "next start", "lint": "next lint", "postbuild": "next-sitemap --config sitemap-generator.js" },Notice the optional
--config sitemap-generator.jsto point to a different filename than the defaultnext-sitemap.js
Add HTML language attribute and locale
It'll convert from <html>...</html> to <html lang="en-US">...</html>.
- In
next.config.jsadd:
module.exports = {
  i18n: {
    locales: ["en-US"],
    defaultLocale: "en-US",
  },
};
Create dynamic RSS feed
refer code from this file https://github.com/GorvGoyl/Personal-Site-Gourav.io/blob/main/scripts/generate-rss.mjs
Add blogging using MDX
(coming soon)
Add analytics to Next.js
Add Cloudflare Web Analytics
It's free free, lightweight, privacy-friendly, and cookie-less analytics provided by Cloudflare.
-
Create free account at Cloudflare web-analytics and get JS Snippet.
-
Create
pages/_document.tsxand paste below code.- Replace
your_tokenwith your token (from that JS snippet)
import Document, { Html, Main, NextScript } from "next/document";
const isProd = process.env.NODE_ENV === "production";

export default class MyDocument extends Document {
  render(): JSX.Element {
    return (
      <Html>
        <body>
          <Main />
          <NextScript />
          {/* Cloudflare Web Analytics */}
          {isProd && (
            <>
              <script
                defer
                src="https://static.cloudflareinsights.com/beacon.min.js"
                data-cf-beacon='{"token": "your_token", "spa": true}'
              />
            </>
          )}
        </body>
      </Html>
    );
  }
}
Done. When you deploy your site to production. Cloudflare will track site analytics.
- Replace
Add Google Analytics
It's free but bloated and uses cookies to track visitors.
-
Create a Google analytics project and get Measurement ID.
-
In your Next.js project, create
/lib/gtag.tsfile and add your Google Measurement ID:export const GA_ANALYTICS_MEASUREMENT_ID = "<INSERT_MEASUREMENT_ID>"; // https://developers.google.com/analytics/devguides/collection/gtagjs/pages export const pageview = (url: URL): void => { window.gtag("config", GA_ANALYTICS_MEASUREMENT_ID, { page_path: url, }); }; type GTagEvent = { action: string; category: string; label: string; value: number; }; // https://developers.google.com/analytics/devguides/collection/gtagjs/events export const event = ({ action, category, label, value }: GTagEvent): void => { window.gtag("event", action, { event_category: category, event_label: label, value, }); }; -
Also install gtag
types:npm i -D @types/gtag.js -
Create
/pages/_document.tsx:import Document, { Html, Head, Main, NextScript } from "next/document"; import { GA_ANALYTICS_MEASUREMENT_ID } from "../lib/gtag"; const isProd = process.env.NODE_ENV === "production"; export default class MyDocument extends Document { render(): JSX.Element { return ( <Html> <Head> {/* enable analytics script only for production */} {isProd && ( <> <script async src={`https://www.googletagmanager.com/gtag/js?id=${GA_ANALYTICS_MEASUREMENT_ID}`} /> <script // eslint-disable-next-line react/no-danger dangerouslySetInnerHTML={{ __html: ` window.dataLayer = window.dataLayer || []; function gtag(){dataLayer.push(arguments);} gtag('js', new Date()); gtag('config', '${GA_ANALYTICS_MEASUREMENT_ID}', { page_path: window.location.pathname, }); `, }} /> </> )} </Head> <body> <Main /> <NextScript /> </body> </Html> ); } } -
Create
/pages/_app.tsx:import { AppProps } from "next/app"; import { useRouter } from "next/router"; import { useEffect } from "react"; import * as gtag from "../lib/gtag"; const isProd = process.env.NODE_ENV === "production"; const App = ({ Component, pageProps }: AppProps): JSX.Element => { const router = useRouter(); useEffect(() => { const handleRouteChange = (url: URL) => { /* invoke analytics function only for production */ if (isProd) gtag.pageview(url); }; router.events.on("routeChangeComplete", handleRouteChange); return () => { router.events.off("routeChangeComplete", handleRouteChange); }; }, [router.events]); // eslint-disable-next-line react/jsx-props-no-spreading return <Component {...pageProps} />; }; export default App;Done. When you deploy your site to production. Google will track site analytics.
Next.js Misc Tips
Open localhost site whenever you start Next.js server
Open https://localhost:3000 site in browser whenever you run npm run start. Add below to package.json file:
"scripts": {
    "start": "start http://localhost:3000 & next dev", // for MAC, use `open` instead of `start`
    }
Check if site is running in production or dev server
Many a times we need to enable some code only on production or dev server. You can check if site is running on production environment or dev server:
const isProd = process.env.NODE_ENV === "production";

if (isProd) {
  console.log("it's prod server bois");
}
Use absolute path like @/components instead of relative path
You can use @/ symbol to access path related to root of project instead of relative to current file path.
For example, you can use import Header from "@/components/Header"; no matter how deeply nested your file is. No more ../../../components/Header etc.
-
Add below to
tsconfig.json:{ "compilerOptions": { "baseUrl": ".", "paths": { // use @/ to access path related to root of project "@/*": ["./*"] } } } -
Add below to
.eslintrc.json:{ "settings": { // to support @/ path "import/resolver": { "typescript": {} // this loads <rootdir>/tsconfig.json to eslint }, "react": { "version": "detect" } }, "parser": "@typescript-eslint/parser", "parserOptions": { "project": "./tsconfig.json", // tells parser relative path of tsconfig.json "ecmaFeatures": { "jsx": true }, "ecmaVersion": 12, "sourceType": "module" }, "extends": ["plugin:import/typescript"], }; -
Restart VSCode.
- Now import some code using
@/in a file e.g.import Header from "@/components/Header"; - You can test for any import errors by running
npm run lint
Redirect a page to an external URL
Useful for creating short memorable links to your projects, resume, etc.
When user visits https://gourav.io/chrome then redirect to https://chrome.google.com/webstore/detail/notion-boost/eciepnnimnjaojlkcpdpcgbfkpcagahd.
Create next.config.js at root of project and paste:
module.exports = {
  async redirects() {
    return [
      {
        source: "/chrome",
        destination:
          "https://chrome.google.com/webstore/detail/notion-boost/eciepnnimnjaojlkcpdpcgbfkpcagahd",
        permanent: true,
      },
    ];
  },
};
Contribute to this cheatsheet
👋 If you'd like to collaborate on this, please email me your suggestions at hey@gourav.io